「釣りの戦略」の版間の差分
Margotbean (トーク | 投稿記録) (Major update. translation needed) |
|||
| 7行目: | 7行目: | ||
このページでは'''釣りの戦略'''についての情報を記載します。 | このページでは'''釣りの戦略'''についての情報を記載します。 | ||
| − | + | {{翻訳}} | |
| − | == | + | ==Basics of Strategy== |
| − | : | + | The availability of many types of fish can depend on various factors: the location of the fishing spot, the season, the time of day, and the weather. Match your fishing location to current conditions as necessary in order to give yourself the chance to catch the type(s) of fish you want. |
| − | + | Below Fishing skill level 4, casting left or right gives you an opportunity to get a higher quality catch than casting up or down, because the maximum casting distance is greater. | |
| − | |||
| − | === | + | ===Location=== |
| − | + | A fishing spot is not divided by ocean, lake and river, but by map. For instance, the river in [[Cindersap Forest]] is not the same as the river in [[Pelican Town]]. | |
| − | + | '''The Sewers''' | |
| − | |||
| − | |||
| − | |||
| − | |||
| − | |||
| − | |||
| − | + | [[The Sewers]] are an easy and productive fishing location, especially to level up the fishing skill or farm treasure. [[Carp]] is the least difficult fish to catch in the game and it is the only fish in the sewers (except for a single [[Fish#Legendary Fish|Legendary Fish]], the [[Mutant Carp]]). Therefore, every cast of the line results in either an immediate item reward or a quick Carp catch. | |
| − | |||
| − | |||
| − | === | + | ===Casting Distance=== |
| − | + | Since the quality of the fish you catch depends on casting distance, you ideally want to cast your bobber as far from land as you can. It is worth noting that the color of the water and the particular fishing spot have no effect on fish quality at all. Only the bobber's depth when you make a catch matters. | |
| − | |||
| − | + | To cast into bubbles, you do not have many options about how far you cast, but bubbles increase your distance by 1 tile over the same spot without bubbles, and may thus increase fish quality, or at least restore what is lost by a shorter cast while still providing the quick bite feature of bubbles. | |
| − | |||
| − | + | In addition to affecting the quality of the fish, distance also affects the chances of catching certain fish over other ones. While all fish can be caught in tiles that have a distance of 1, a lot of the "better" fish have a higher chance to be caught the further away from land you go. | |
| − | |||
| − | == | + | ==Distance Images== |
| − | + | The following images show the distance from land for all fishing spots, color coded as: | |
| − | + | [[File:DistanceKey.png]] | |
| − | + | ===[[The Farm]]=== | |
| − | :[[File: | + | {| |
| + | |- | ||
| + | |'''Standard Farm''' | ||
| + | |'''Riverland Farm''' | ||
| + | |- | ||
| + | |[[File:StandardFarmDistances.png|thumb|left]] | ||
| + | |[[File:RiverlandFarmDistances.png|thumb|left]] | ||
| + | |- | ||
| + | |'''Forest Farm''' | ||
| + | |'''Hill-top Farm''' | ||
| + | |- | ||
| + | |[[File:ForestFarmDistances.png|thumb|left]] | ||
| + | |[[File:Hill-topFarmDistances.png|thumb|left]] | ||
| + | |- | ||
| + | |'''Wilderness Farm''' | ||
| + | |'''Four Corners Farm''' | ||
| + | |- | ||
| + | |style="vertical-align: top;"|[[File:WildernessFarmDistances.png|thumb|left]] | ||
| + | |[[File:4CornersFarmDistances.png|thumb|left]] | ||
| + | |- | ||
| + | | | ||
| + | ===[[Pelican Town]]=== | ||
| + | | | ||
| + | ===[[Cindersap Forest]]=== | ||
| + | |- | ||
| + | |style="vertical-align: top;"|[[File:TownDistances.png|thumb|left]] | ||
| + | |[[File:ForestDistances.png|thumb|left]] | ||
| + | |- | ||
| + | | | ||
| + | ===[[The Beach]]=== | ||
| + | | | ||
| + | ===[[The Mountain]]s=== | ||
| + | |- | ||
| + | |[[File:BeachDistances.png|thumb|left]] | ||
| + | |style="vertical-align: top;"|[[File:MountainDistances.png|thumb|left]] | ||
| + | |- | ||
| + | | | ||
| + | ===[[The Desert]]=== | ||
| + | | | ||
| + | ===[[The Sewers]]=== | ||
| + | |- | ||
| + | |[[File:DesertDistances.png|thumb|left]] | ||
| + | |[[File:SewerDistances.png|thumb|left]] | ||
| + | |- | ||
| + | | | ||
| + | ===[[The Mines]]=== | ||
| + | | | ||
| + | ===[[Secret Woods|The Secret Woods]]=== | ||
| + | |- | ||
| + | |style="vertical-align: top;"|[[File:MinesDistances.png|thumb|left|Mine floors 20, 60, & 100]] | ||
| + | |[[File:SecretWoodsDistances.png|thumb|left]] | ||
| + | |- | ||
| + | | | ||
| + | ===[[Night Market]]=== | ||
| + | [[File:SubmarineDistances.png|thumb|left|The submarine ride at the [[Night Market]]]]{{Clear}} | ||
| + | ===[[Mutant Bug Lair]]=== | ||
| + | [[File:MutantBugLairDistances.png|thumb|left]] | ||
| + | |style="vertical-align: top;"| | ||
| + | ===[[Witch's Swamp]]=== | ||
| + | [[File:SwampDistances.png|thumb|left]] | ||
| + | |- | ||
| + | |} | ||
| − | == | + | ==Location Tables== |
| − | + | Note that the 5 legendary fish are not included in the tables below. The following tables are based on the data in <tt>Content/Locations.xnb</tt>. | |
| − | |||
| − | |||
| − | + | ===[[Pelican Town]]=== | |
| − | |||
| − | |||
| − | |||
| − | |||
| − | |||
| − | |||
| − | ===[[ | ||
{{FishLocations Town}} | {{FishLocations Town}} | ||
| − | ===[[ | + | ===[[The Beach]]=== |
{{FishLocations Beach}} | {{FishLocations Beach}} | ||
| − | ===[[ | + | ===[[Cindersap Forest]]=== |
{{FishLocations Forest}} | {{FishLocations Forest}} | ||
| − | ===[[ | + | ===[[The Mountain]]=== |
{{FishLocations Mountain}} | {{FishLocations Mountain}} | ||
| − | + | ===[[The Mines]]=== | |
| − | ===[[ | ||
{{FishLocations Mines}} | {{FishLocations Mines}} | ||
| − | ===[[ | + | ===[[Secret Woods]]=== |
| − | |||
| − | |||
{{FishLocations Secret Woods}} | {{FishLocations Secret Woods}} | ||
| − | ===[[ | + | ===[[The Desert]]=== |
| − | + | {{FishLocations Desert}} | |
| + | |||
| + | ===[[The Sewers]]=== | ||
{{FishLocations Sewers}} | {{FishLocations Sewers}} | ||
| − | ===[[ | + | ===[[Mutant Bug Lair]]=== |
| − | |||
| − | |||
| − | |||
| − | |||
{{FishLocations Mutant Bug Lair}} | {{FishLocations Mutant Bug Lair}} | ||
| − | ===[[ | + | ===[[Witch's Swamp]]=== |
| − | |||
{{FishLocations Witch's Swamp}} | {{FishLocations Witch's Swamp}} | ||
| + | |||
| + | ==魚に関するインフォグラフ== | ||
| + | ''Note that this graph is accurate as of [[Version History#1.3|v1.3]], but not complete (it does not include the [[Mutant Bug Lair]], [[Witch's Swamp]], [[Night Market]] fish or the [[Cindersap Forest]] pond).'' | ||
| + | |||
| + | [[File:The Ultimate Fishing Infograph.png|1000px]] | ||
[[Category:ゲームプレイ]] | [[Category:ゲームプレイ]] | ||
2020年7月20日 (月) 23:42時点における版
このページでは釣りの戦略についての情報を記載します。

|
不完全な翻訳 この記事またはセクションはまだ完全に日本語に翻訳されていません。あなたがこのテキストを編集して、記事の作成をサポートしてくれることを歓迎します。 |
Basics of Strategy
The availability of many types of fish can depend on various factors: the location of the fishing spot, the season, the time of day, and the weather. Match your fishing location to current conditions as necessary in order to give yourself the chance to catch the type(s) of fish you want.
Below Fishing skill level 4, casting left or right gives you an opportunity to get a higher quality catch than casting up or down, because the maximum casting distance is greater.
Location
A fishing spot is not divided by ocean, lake and river, but by map. For instance, the river in Cindersap Forest is not the same as the river in Pelican Town.
The Sewers
The Sewers are an easy and productive fishing location, especially to level up the fishing skill or farm treasure. Carp is the least difficult fish to catch in the game and it is the only fish in the sewers (except for a single Legendary Fish, the Mutant Carp). Therefore, every cast of the line results in either an immediate item reward or a quick Carp catch.
Casting Distance
Since the quality of the fish you catch depends on casting distance, you ideally want to cast your bobber as far from land as you can. It is worth noting that the color of the water and the particular fishing spot have no effect on fish quality at all. Only the bobber's depth when you make a catch matters.
To cast into bubbles, you do not have many options about how far you cast, but bubbles increase your distance by 1 tile over the same spot without bubbles, and may thus increase fish quality, or at least restore what is lost by a shorter cast while still providing the quick bite feature of bubbles.
In addition to affecting the quality of the fish, distance also affects the chances of catching certain fish over other ones. While all fish can be caught in tiles that have a distance of 1, a lot of the "better" fish have a higher chance to be caught the further away from land you go.
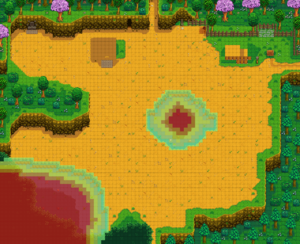
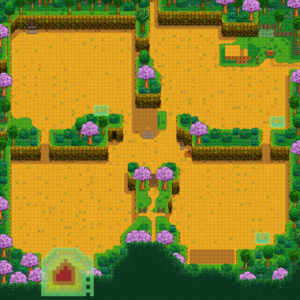
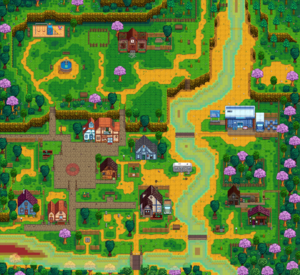
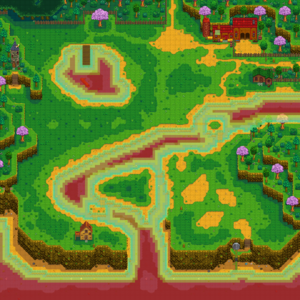
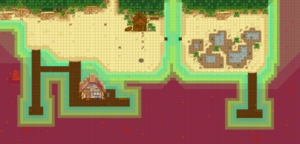
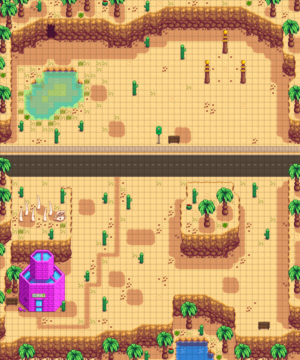
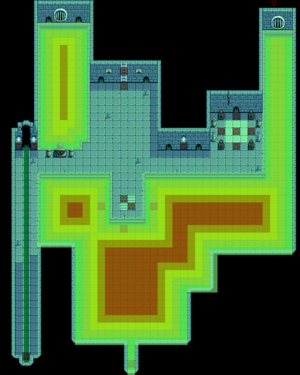
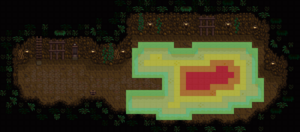
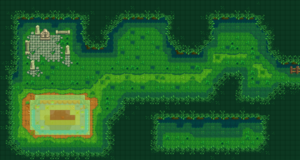
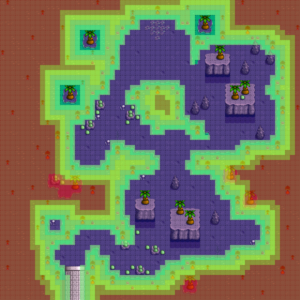
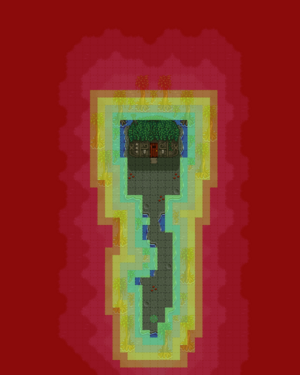
Distance Images
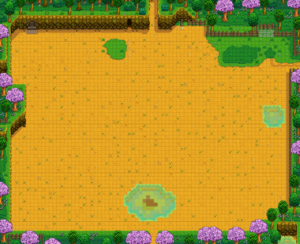
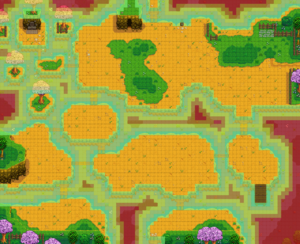
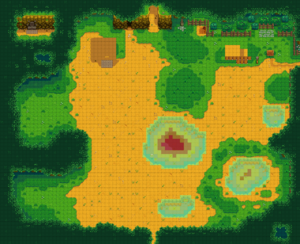
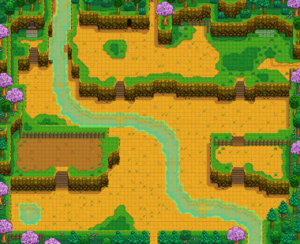
The following images show the distance from land for all fishing spots, color coded as:
![]()
The Farm
| Standard Farm | Riverland Farm |
| Forest Farm | Hill-top Farm |
| Wilderness Farm | Four Corners Farm |
Pelican Town |
Cindersap Forest |
The Beach |
The Mountains |
The Desert |
The Sewers |
The Mines |
The Secret Woods |
Night Market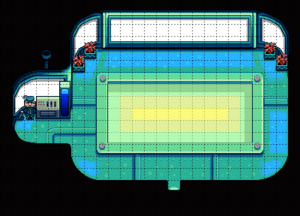 The submarine ride at the Night Market Mutant Bug Lair |
Witch's Swamp |
Location Tables
Note that the 5 legendary fish are not included in the tables below. The following tables are based on the data in Content/Locations.xnb.
Pelican Town
| 時刻 | |||||||||||||||||||||
|---|---|---|---|---|---|---|---|---|---|---|---|---|---|---|---|---|---|---|---|---|---|
| 6 | 7 | 8 | 9 | 10 | 11 | 0 | 1 | 2 | 3 | 4 | 5 | 6 | 7 | 8 | 9 | 10 | 11 | 0 | 1 | ||
| 晴れの日のみ | |||||||||||||||||||||
| 雨の日のみ | |||||||||||||||||||||
| 雨の日のみ | |||||||||||||||||||||
| 6 | 7 | 8 | 9 | 10 | 11 | 0 | 1 | 2 | 3 | 4 | 5 | 6 | 7 | 8 | 9 | 10 | 11 | 0 | 1 | ||
| 晴れの日のみ | |||||||||||||||||||||
| 晴れの日のみ | |||||||||||||||||||||
| 雨の日のみ | |||||||||||||||||||||
| 6 | 7 | 8 | 9 | 10 | 11 | 0 | 1 | 2 | 3 | 4 | 5 | 6 | 7 | 8 | 9 | 10 | 11 | 0 | 1 | ||
| 雨の日のみ | |||||||||||||||||||||
| 雨の日のみ | |||||||||||||||||||||
| 雨の日のみ | |||||||||||||||||||||
| 6 | 7 | 8 | 9 | 10 | 11 | 0 | 1 | 2 | 3 | 4 | 5 | 6 | 7 | 8 | 9 | 10 | 11 | 0 | 1 | ||
The Beach
| 時刻 | |||||||||||||||||||||
|---|---|---|---|---|---|---|---|---|---|---|---|---|---|---|---|---|---|---|---|---|---|
| 6 | 7 | 8 | 9 | 10 | 11 | 0 | 1 | 2 | 3 | 4 | 5 | 6 | 7 | 8 | 9 | 10 | 11 | 0 | 1 | ||
| 雨の日のみ | |||||||||||||||||||||
| 6 | 7 | 8 | 9 | 10 | 11 | 0 | 1 | 2 | 3 | 4 | 5 | 6 | 7 | 8 | 9 | 10 | 11 | 0 | 1 | ||
| 雨の日のみ | |||||||||||||||||||||
| 晴れの日のみ | |||||||||||||||||||||
| 6 | 7 | 8 | 9 | 10 | 11 | 0 | 1 | 2 | 3 | 4 | 5 | 6 | 7 | 8 | 9 | 10 | 11 | 0 | 1 | ||
| 雨の日のみ | |||||||||||||||||||||
| 雨の日のみ | |||||||||||||||||||||
| 6 | 7 | 8 | 9 | 10 | 11 | 0 | 1 | 2 | 3 | 4 | 5 | 6 | 7 | 8 | 9 | 10 | 11 | 0 | 1 | ||
| 雨の日のみ | |||||||||||||||||||||
Cindersap Forest
森には、中央の池と南へ流れる川の2ヶ所の釣りポイントがあることに注意。
| 時刻 | |||||||||||||||||||||
|---|---|---|---|---|---|---|---|---|---|---|---|---|---|---|---|---|---|---|---|---|---|
| 6 | 7 | 8 | 9 | 10 | 11 | 0 | 1 | 2 | 3 | 4 | 5 | 6 | 7 | 8 | 9 | 10 | 11 | 0 | 1 | ||
| 川 | 晴れの日のみ | ||||||||||||||||||||
| 川 | 雨の日のみ | ||||||||||||||||||||
| 川 | |||||||||||||||||||||
| 両方 | |||||||||||||||||||||
| 池 | |||||||||||||||||||||
| 川 | 雨の日のみ | ||||||||||||||||||||
| 川 | |||||||||||||||||||||
| 6 | 7 | 8 | 9 | 10 | 11 | 0 | 1 | 2 | 3 | 4 | 5 | 6 | 7 | 8 | 9 | 10 | 11 | 0 | 1 | ||
| 川 | |||||||||||||||||||||
| 川 | 晴れの日のみ | ||||||||||||||||||||
| 川 | 晴れの日のみ | ||||||||||||||||||||
| 川 | |||||||||||||||||||||
| 両方 | |||||||||||||||||||||
| 両方 | |||||||||||||||||||||
| 川 | 雨の日のみ | ||||||||||||||||||||
| 川 | |||||||||||||||||||||
| 6 | 7 | 8 | 9 | 10 | 11 | 0 | 1 | 2 | 3 | 4 | 5 | 6 | 7 | 8 | 9 | 10 | 11 | 0 | 1 | ||
| 川 | |||||||||||||||||||||
| 川 | |||||||||||||||||||||
| 川 | 雨の日のみ | ||||||||||||||||||||
| 川 | |||||||||||||||||||||
| 池 | |||||||||||||||||||||
| 両方 | |||||||||||||||||||||
| 池 | |||||||||||||||||||||
| 川 | 雨の日のみ | ||||||||||||||||||||
| 両方 | 雨の日のみ | ||||||||||||||||||||
| 川 | |||||||||||||||||||||
| 6 | 7 | 8 | 9 | 10 | 11 | 0 | 1 | 2 | 3 | 4 | 5 | 6 | 7 | 8 | 9 | 10 | 11 | 0 | 1 | ||
| 川 | |||||||||||||||||||||
| 川 | |||||||||||||||||||||
| 池 | |||||||||||||||||||||
| 両方 | |||||||||||||||||||||
| 川 | |||||||||||||||||||||
| 両方 | |||||||||||||||||||||
| 両方 | |||||||||||||||||||||
| 川 | |||||||||||||||||||||
The Mountain
鉱山の外にある湖についての情報なので間違えないように注意。
| 時刻 | |||||||||||||||||||||
|---|---|---|---|---|---|---|---|---|---|---|---|---|---|---|---|---|---|---|---|---|---|
| 6 | 7 | 8 | 9 | 10 | 11 | 0 | 1 | 2 | 3 | 4 | 5 | 6 | 7 | 8 | 9 | 10 | 11 | 0 | 1 | ||
| 雨の日のみ | |||||||||||||||||||||
| 6 | 7 | 8 | 9 | 10 | 11 | 0 | 1 | 2 | 3 | 4 | 5 | 6 | 7 | 8 | 9 | 10 | 11 | 0 | 1 | ||
| 晴れの日のみ | |||||||||||||||||||||
| 6 | 7 | 8 | 9 | 10 | 11 | 0 | 1 | 2 | 3 | 4 | 5 | 6 | 7 | 8 | 9 | 10 | 11 | 0 | 1 | ||
| 雨の日のみ | |||||||||||||||||||||
| 6 | 7 | 8 | 9 | 10 | 11 | 0 | 1 | 2 | 3 | 4 | 5 | 6 | 7 | 8 | 9 | 10 | 11 | 0 | 1 | ||
The Mines
| 時刻 | |||||||||||||||||||||
|---|---|---|---|---|---|---|---|---|---|---|---|---|---|---|---|---|---|---|---|---|---|
| 6 | 7 | 8 | 9 | 10 | 11 | 0 | 1 | 2 | 3 | 4 | 5 | 6 | 7 | 8 | 9 | 10 | 11 | 0 | 1 | ||
| 20階と60階 | |||||||||||||||||||||
| 20階 | |||||||||||||||||||||
| 全域 | |||||||||||||||||||||
| 全域 | |||||||||||||||||||||
| 60階 | |||||||||||||||||||||
| 100階 | |||||||||||||||||||||
Secret Woods
| 時刻 | |||||||||||||||||||||
|---|---|---|---|---|---|---|---|---|---|---|---|---|---|---|---|---|---|---|---|---|---|
| 6 | 7 | 8 | 9 | 10 | 11 | 0 | 1 | 2 | 3 | 4 | 5 | 6 | 7 | 8 | 9 | 10 | 11 | 0 | 1 | ||
| 雨の日のみ | |||||||||||||||||||||
The Desert
| 時刻 | |||||||||||||||||||||
|---|---|---|---|---|---|---|---|---|---|---|---|---|---|---|---|---|---|---|---|---|---|
| 6 | 7 | 8 | 9 | 10 | 11 | 0 | 1 | 2 | 3 | 4 | 5 | 6 | 7 | 8 | 9 | 10 | 11 | 0 | 1 | ||
The Sewers
| 時刻 | |||||||||||||||||||||
|---|---|---|---|---|---|---|---|---|---|---|---|---|---|---|---|---|---|---|---|---|---|
| 6 | 7 | 8 | 9 | 10 | 11 | 0 | 1 | 2 | 3 | 4 | 5 | 6 | 7 | 8 | 9 | 10 | 11 | 0 | 1 | ||
Mutant Bug Lair
| 時刻 | |||||||||||||||||||||
|---|---|---|---|---|---|---|---|---|---|---|---|---|---|---|---|---|---|---|---|---|---|
| 6 | 7 | 8 | 9 | 10 | 11 | 0 | 1 | 2 | 3 | 4 | 5 | 6 | 7 | 8 | 9 | 10 | 11 | 0 | 1 | ||
Witch's Swamp
| 時刻 | |||||||||||||||||||||
|---|---|---|---|---|---|---|---|---|---|---|---|---|---|---|---|---|---|---|---|---|---|
| 6 | 7 | 8 | 9 | 10 | 11 | 0 | 1 | 2 | 3 | 4 | 5 | 6 | 7 | 8 | 9 | 10 | 11 | 0 | 1 | ||
| 雨の日のみ | |||||||||||||||||||||
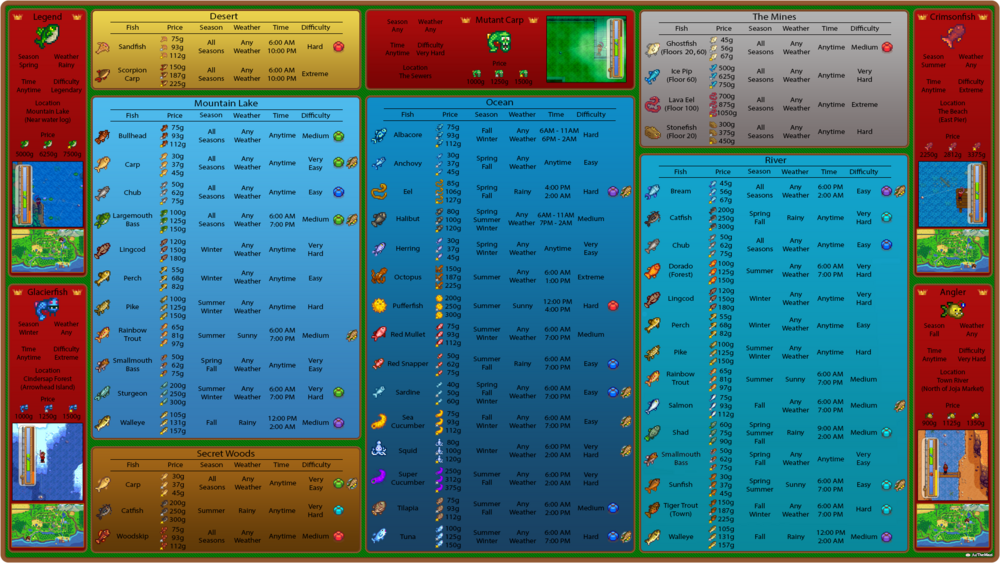
魚に関するインフォグラフ
Note that this graph is accurate as of v1.3, but not complete (it does not include the Mutant Bug Lair, Witch's Swamp, Night Market fish or the Cindersap Forest pond).
